

Appearance
Installation
For merchants
From zero to your first SMS. Plan about 30 minutes, plus the time your SMS provider needs to approve your sender ID.
Before you start
You need:
- Shopware 6.6 or 6.7 with PHP 8.2 or newer. The Shopware version is shown at the top of the Administration's left menu, under Administration.
- An Administrator login to the Shopware Administration (the back office at
https://<your-shop>/admin). - An account with an SMS provider — Termii, Sendexa, Africa's Talking or Twilio — with API credentials and an approved sender ID (for Twilio: a sending number). Approval can take the provider a few days; request it early. Not sure which one? See Providers & routing.
- Someone with access to your server or hosting (to install the plugin with Composer and keep the background worker running). If your agency or host manages the shop, send them this page.
1. Install the plugin
Choose one of the two ways.
Option A — Composer (for developers and hosts)
In the Shopware project directory on the server:
bash
composer require "kommandhub/sms-sw:^0.9@beta"
bin/console plugin:refresh
bin/console plugin:install --activate KommandhubSmsSW
bin/console cache:clear
@beta is needed while the plugin is a beta release. Background: Shopware's guide on extension management.
Option B — Upload a ZIP file (in the Administration)
- Get the ZIP file of SMS for Shopware 6, version 0.9.0-beta.1.
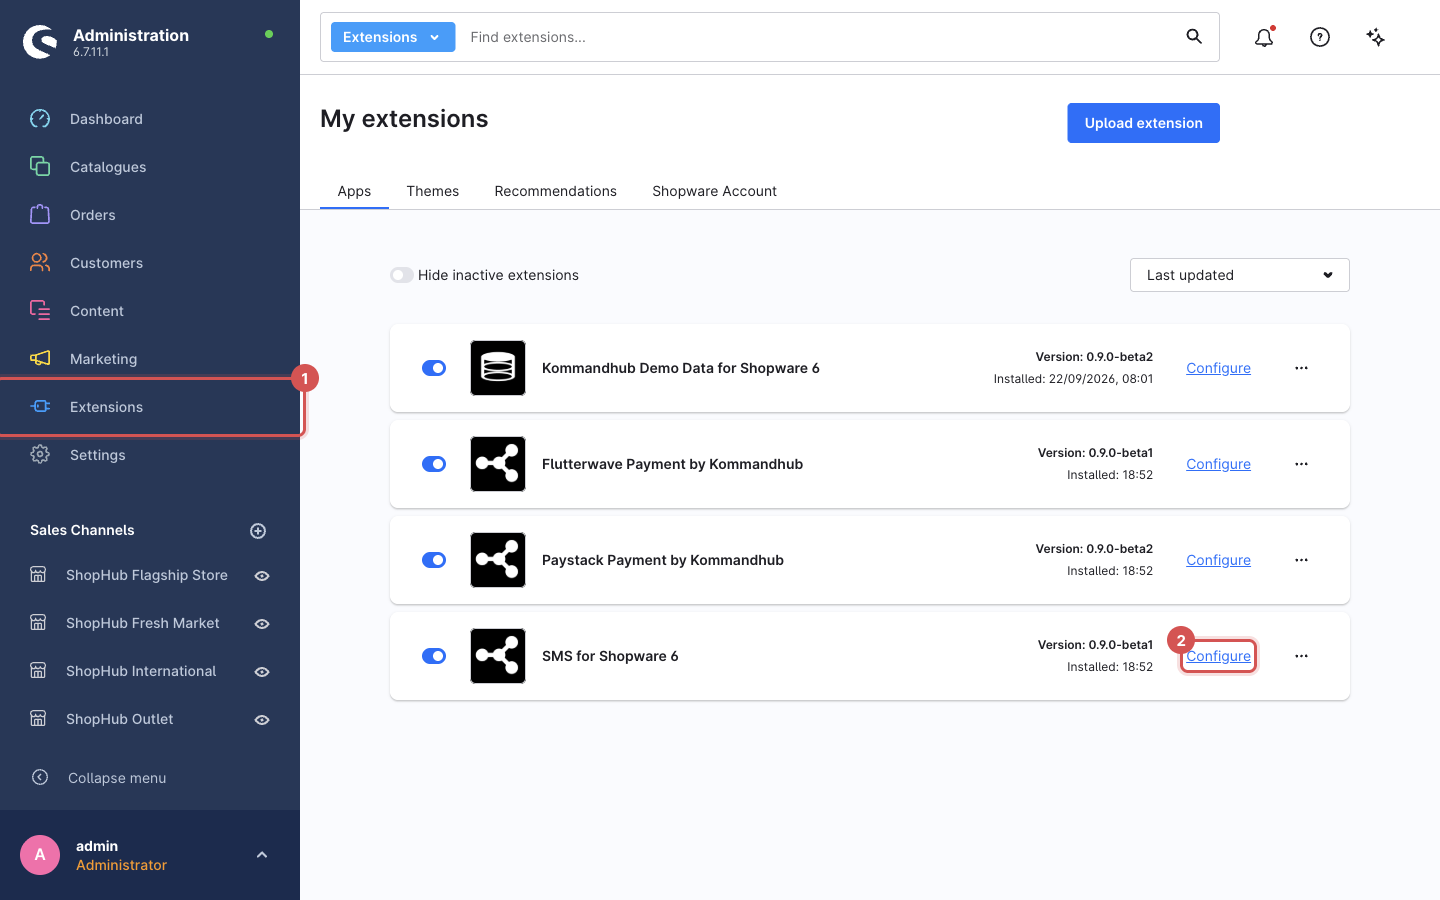
- In the Administration click Extensions → My extensions.
- Click Upload extension (top right) and choose the ZIP file.
- The plugin appears in the list. Click Install, then switch the toggle on the left of its row on to activate it.
More about this screen: Shopware's My extensions documentation.
Check it is installed
Under Extensions → My extensions you see SMS for Shopware 6 with the version 0.9.0-beta1 and the toggle switched on.
Installing adds:
- the SMS templates screen under Settings → Extensions;
- the Send SMS action in the Flow Builder;
- a country dial-code list next to phone fields in your storefront.
Nothing is sent yet.
2. Ask customers for a phone number
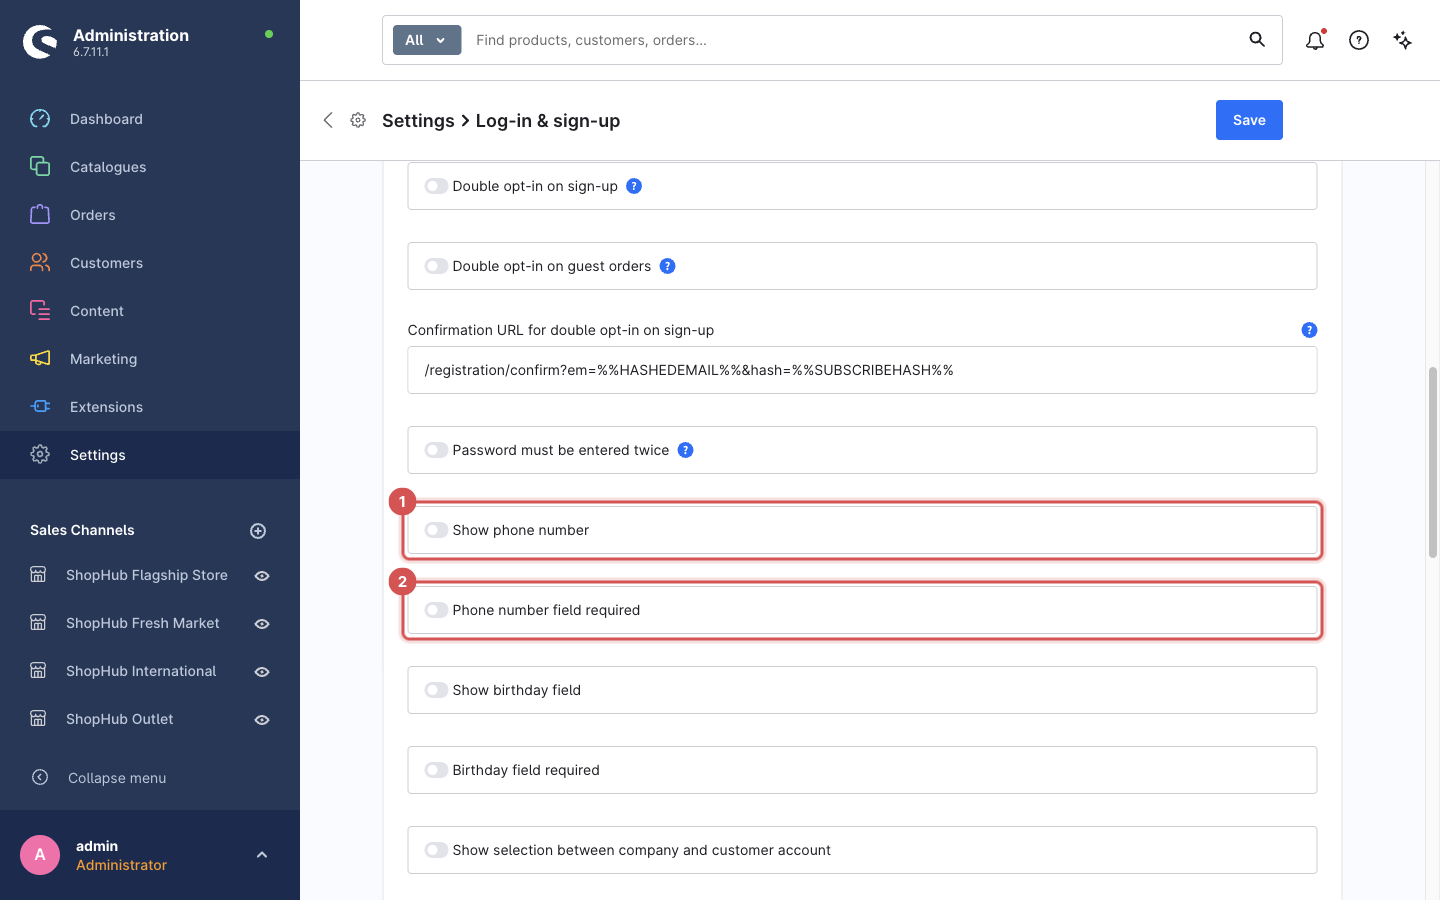
Shopware does not ask for phone numbers by default. Go to Settings → Log-in & sign-up, switch on Show phone number and Phone number field required, and click Save.
Details: Phone numbers & dial codes.
3. Make sure the queue is processed
SMS are sent in the background by Shopware's message queue, so a checkout never waits for the SMS provider. Something has to work through that queue:
In production, your developer or host runs a worker on the server permanently, for example with Supervisor or systemd:
bashbin/console messenger:consume async --time-limit=300 --memory-limit=512MHow to set this up reliably is described in Shopware's message queue guide.
For testing only, a browser tab with the Administration open also works through the queue. Do not rely on this in production — nothing is sent when nobody is logged in.
Without a worker, SMS pile up and are sent late or never. The Send test message button (step 6) is the exception: it sends immediately.
4. Enter your provider details
Go to Extensions → My extensions and click Configure next to SMS for Shopware 6 (see the screenshot in step 1).
Leave the Sales Channel drop-down at the top on All Sales Channels for now.
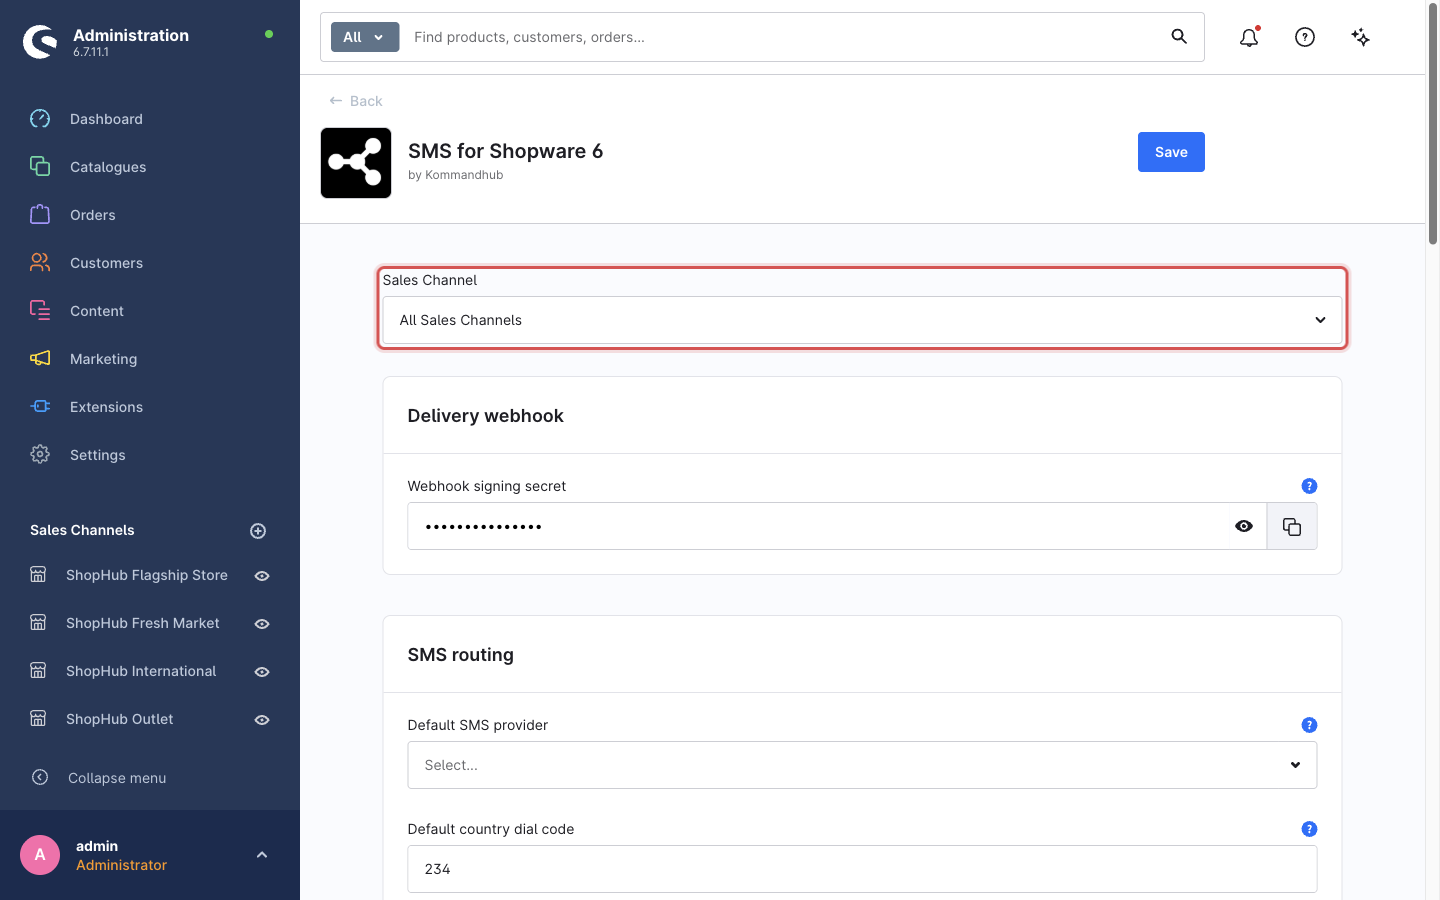
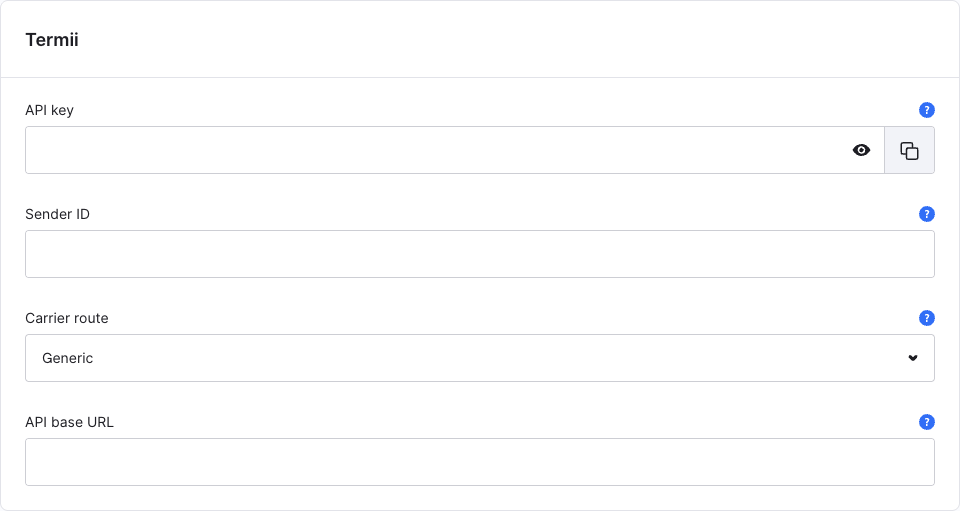
Scroll to the box of your provider and fill it in. For Termii: API key and Sender ID. The other boxes stay empty.
In SMS routing choose your provider under Default SMS provider, and set Default country dial code to your main country without
+(e.g.234for Nigeria,233for Ghana,254for Kenya).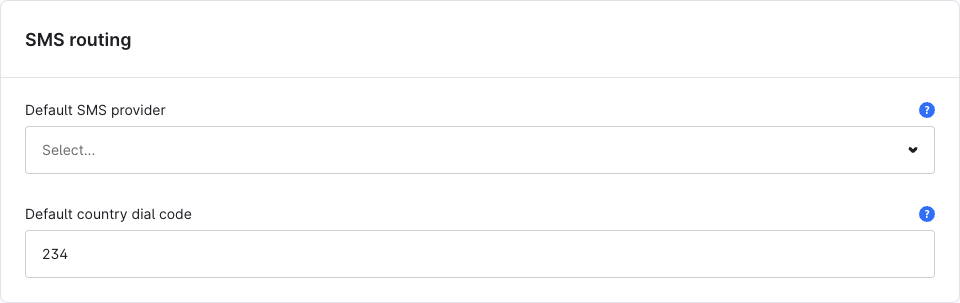
Click Save at the top right.
Every field is explained in the Configuration reference.
5. Create an SMS template
Settings → Extensions → SMS templates → Add SMS template. Choose the event Order confirmation, give it a name, switch it Active, write the message and Save.
Step by step with screenshots: Create an SMS template.
6. Send yourself a test message
On the saved template, click Send test message, enter your own mobile number in international format (+234…) and click Send test. The SMS arrives within seconds.
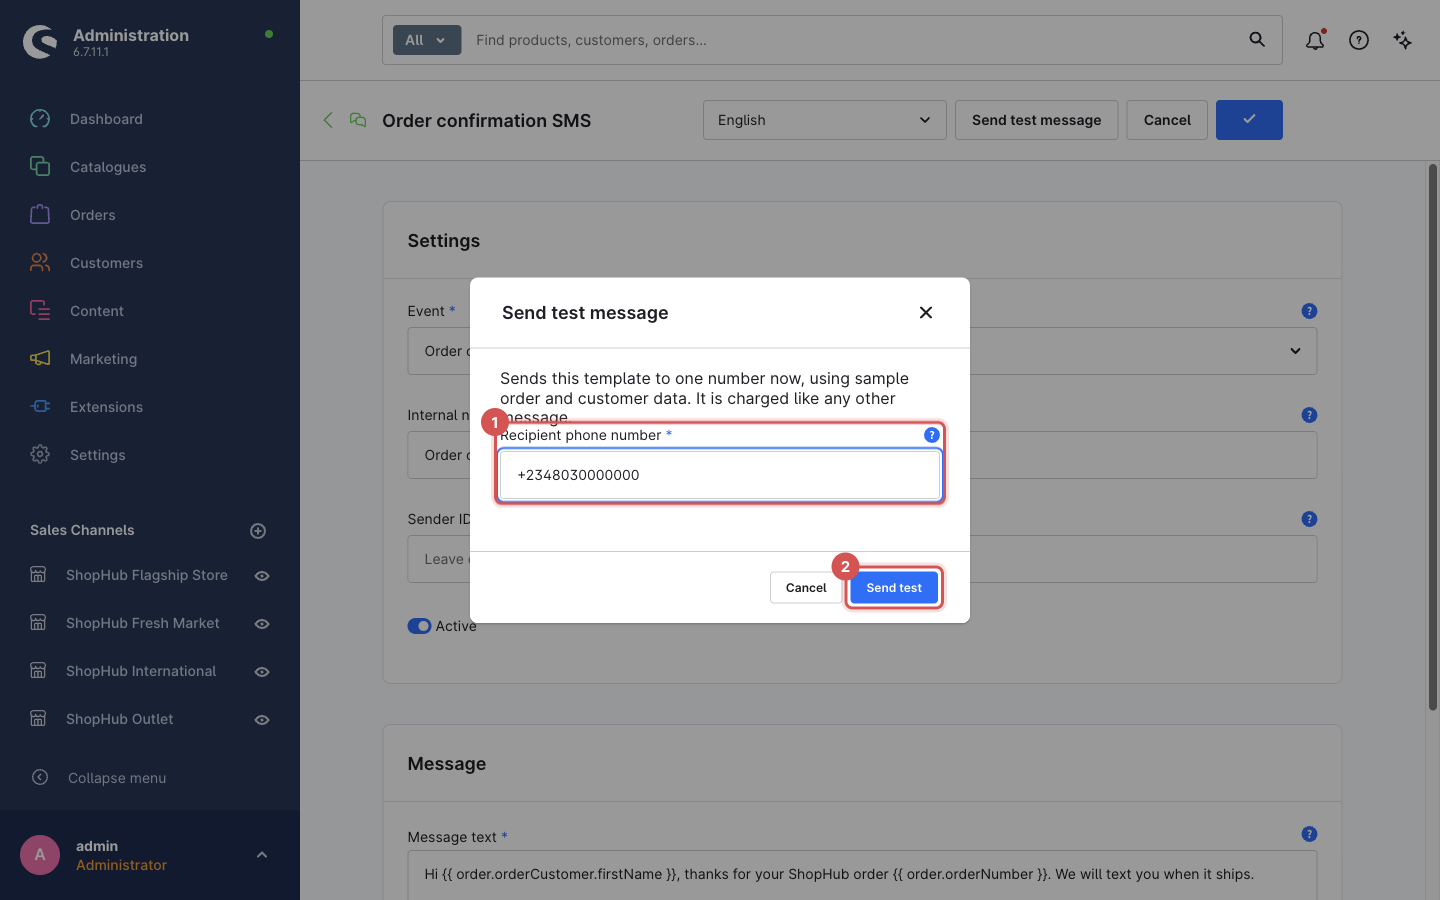
If it fails, the dialog tells you why — see Troubleshooting → Test message errors. Fix this before continuing.
7. Add the SMS to a flow
Settings → Flow Builder → Order placed → tab Flow: add the action Send SMS, choose the template, Save action, then Save the flow.
Step by step with screenshots: Send SMS from a flow.
8. Final check
Place a test order in your storefront, with your own mobile number in the billing address. The order confirmation email and the SMS arrive.
If the SMS does not arrive, follow Troubleshooting → No SMS arrives.
Optional — delivery reports (Termii)
To see in the log whether each SMS reached the phone:
In the plugin configuration, box Delivery webhook, enter the Webhook signing secret — for Termii, your Termii API key.
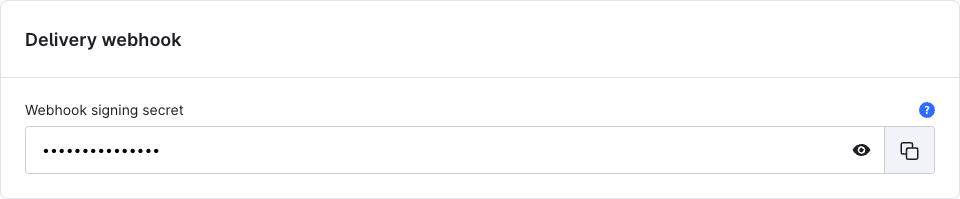
In your Termii dashboard, set the delivery-report URL to
https://<your-shop-domain>/notifications/webhook. The domain must be one of your storefront domains in Shopware (see Shopware's sales channel documentation).
Reports are written to the plugin log (var/log/kommandhub_sms_<env>.log).
Who can manage SMS templates
In this version only users with the Administrator flag can open SMS templates. The role permission SMS for Shopware 6 → Manage does not work yet — see Known issues. How roles work in general: Shopware's users & permissions documentation.
Updating
bash
composer update kommandhub/sms-sw
bin/console plugin:refresh
bin/console plugin:update KommandhubSmsSW
bin/console cache:clear
ZIP installs: upload the new ZIP under Extensions → My extensions → Upload extension, then click Update. Your templates and settings are kept. Update only this package, not all dependencies.
Uninstalling
- First remove the Send SMS actions from your flows (otherwise those flows log a warning every time).
- Extensions → My extensions, click ⋯ next to SMS for Shopware 6, choose Uninstall — or run
bin/console plugin:uninstall KommandhubSmsSW. - Shopware asks whether to keep the plugin's data. If you do not keep it, all SMS templates are deleted permanently.